 |
| This is the Primer I use for all my Miniatures, it provides a nice even coat I haven't had any issues with all the cans I have used. |
 |
| 1st step is to clean up all the mold lines and primer them, it goes without saying by the pictures i totally assemble my miniatures. I believe if you can't see it it doesn't need paint. |
 |
| Here this miniature is primed and ready for painting |
 |
| the next step for this guy is a Base coat of Bathaser gold |
 |
| After the base coat is dry I apply a Heavy wash of Agrax earth shade |
 |
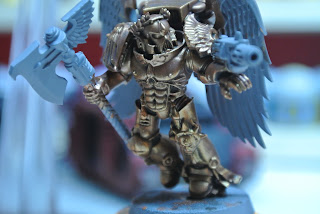
| After the base coat and wash are dry I applied a HEAVY dry brushing of Gehenna's gold with a wash of Reikland flesh shade to bring out the reds and yellows in the gold. |
 |
| After the previous steps I took a LIGHT dry brushing of P3 solid gold |
 |
| Here you can see the armor done and moving into blocking in the wings sword and guns, I used Celestra grey for the base coat on the wings P3 coal black for the sword and Chaos Black for the guns. |
This was my first attempt at a tutorial for armor and wings, thou I don't show the other parts I will post finished pictures of them and comment on what I did to achieve the final finished miniatures. This is a decent first attempt at a tutorial IMO for armor and wings using Mostly the new GWS paints. If you have any questions please comment and I will try to answer them if I can.


No comments:
Post a Comment